11 Preparation for the practical exercise
For the practical, we’ll be using the R statistical programming language and the Git version control system. We’ll also be using an integrated development environment (IDE) for each: RStudio and GitHub, respectively.
The installation and setup can be a bit long-winded, but once done you should be good to go until you change or reformat your computer. The steps below are my summary and (hopefully) more intuitive adaptation of the instructions provided for setting up GitHub and version control with R. If my steps don’t work its probably best to read up there. Another great resource is HappyGitWithR, who work through the steps very thoroughly on different operating systems (Windows, Mac, Linux). In general, if a step is not working, you probably have to redo the previous step…
First we’ll start with the necessary software.
- Download and install (or upgrade to if already installed) the latest version of R
- Download and install (or upgrade to if already installed) the latest free version of RStudio Desktop
- Download and install the latest version of Git - accept all the defaults
Then get started with GitHub:
- Create a GitHub account
- Run through the 10 minute GitHub tutorial that is offered when you activate your GitHub Account (It’ll really help you get the idea behind what Git does!)
Now you have RStudio, R and Git installed, and you have a working GitHub account that lets you do stuff online, but what remains is to get GitHub working locally and configuring RStudio to use GitHub.
Install GitHub CLI (Command Line Interface). For Windows you can download the installer here
Open RStudio.
- Select the
Terminaltab (top left, next toConsole) - Enter
gh auth login, then follow the prompts:- Select
GitHub.com - When prompted for your preferred protocol for Git operations, select
HTTPS - When asked if you would like to authenticate to Git with your GitHub credentials, enter
Y - When asked how you would like to authenticate select
Login with web browser - Copy the 8-digit code and hit
Enter - Github.com will open in your internet browser - paste the code and hit enter
- If any of these steps don’t work, just start again with
gh auth loginin Terminal
- Select
Now that GitHub is starting to enforce 2-factor authentication, you may also need to do the following (especially if you get login issues at the end of step 10):
- We need to add a “personal access token” (PAT) which is generated by GitHub and added to R. We’ll manage this using
library(usethis)as it simplifies things. See this article for a full explanation.- First, install the package by running
install.packages("usethis")in the R console - Second, create a Github authentication token by running
usethis::create_github_token()in the R console- Follow the prompts. Give the token a sensible name like “personal-laptop-rstudio-git” so you can work out what it is if you need to later
- Copy the code displayed - You will not be able to see it again!
- Third, run
gitcreds::gitcreds_set()in the R console- When prompted, paste your token into R
- First, install the package by running
- In RStudio
- Go to
Global Options(from theToolsmenu) - Click
Git/SVN - Make sure
Enable version control interface for RStudio projectsis on - If necessary, enter the path for your Git or SVN executable where provided (this shouldn’t be needed, but may)
- Click
Apply - Restart RStudio
Ok, now everything should be working. If not, and you’ve tried repeating steps, have a look at the installation section of Happy Git with R to troubleshoot…
The next steps (explained below) are to fork and clone your first repo to see if everything is working, and then to modify a file in RStudio, push it back to your forked repo, and then create a pull request for me to review and accept your changes. This let’s me know that you’ve made it through the preparation for the practical, and it gives me your GitHub username.
- In GitHub:
- Make sure you are logged in, search and navigate to
https://github.com/PlantEcologi/BIO3019S_test - Click
Fork, which will make a copy of the repository to your own workspace - Copy the URL to your own version and follow the instructions below for cloning the repository in RStudio
- In RStudio:
- In the top-right of the window you’ll see
Project: (None)- click on it and selectNew ProjectthenVersion ControlthenGit - In the
Repository URl:box paste the URL to your forked repo (It should look something like :https://github.com/YourGitHubUsername/your-forked-repo_name.git) Project directory nameshould fill automatically- For
Create project as subdirectory of:hitBrowseand navigate through your file system to where you want to put your folder for storing your Git repositories. I recommend something high in your directory system like~Documents/GIT. Avoid putting it in a folder that syncs online like a OneDrive, GoogleDrive, iCloud or Dropbox folder. If you’ve used Git before you may have set this already and can skip this step. - Click
Create Repository
Your RStudio window should now look something like this:
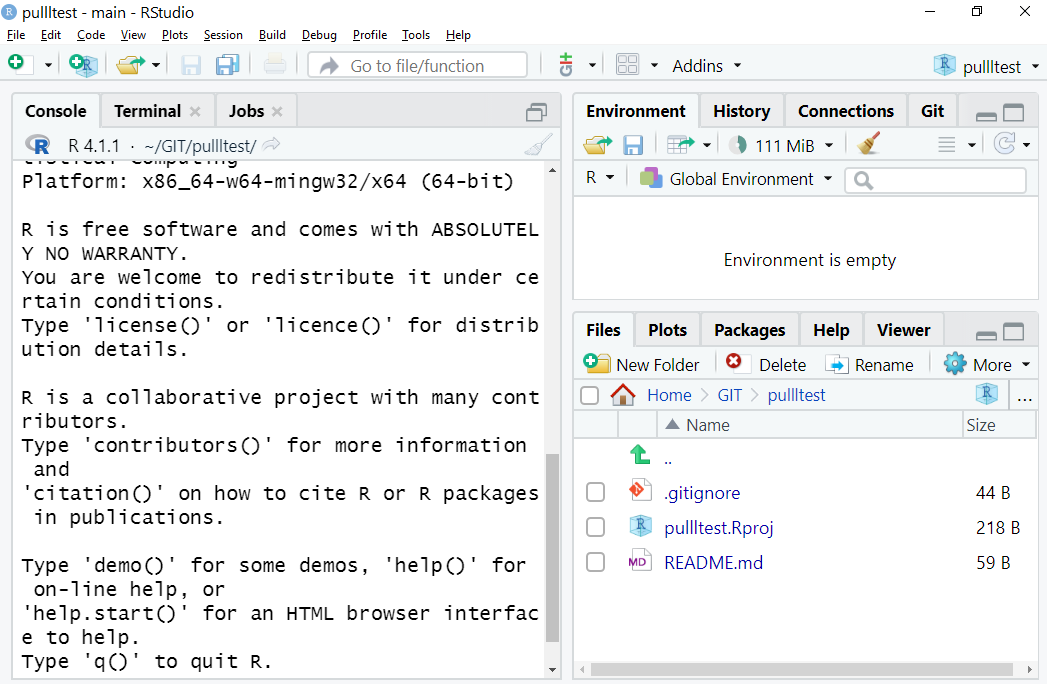
Figure 11.1: What you should see… Note there are three files in the Files tab in the bottom-right window, and you should see a Git tab for the top-right window. It also says pullltest in the project drop-down top-right on mine, but yours will display the name you gave your forked repo.
- Open the
README.mdfile in RStudio - Add your message (something like “Hi! This is Real Name and I’ve made it this far!!!”) and save the file
- Select the
Gittab in the top-right window - Check the box next to
README.mdand clickCommit - Add a
Commit messageto say what changes you’ve made - Then hit
Push - It may ask you to authenticate. Select
Authenticate in your web browser. The web browser will ask you to give Git permissions. Allow the permissions and it should work.
If you get an error at this point to the effect of “You do not have permission to push to this repository”, then you may have forgotten to fork your own repo from my one and are trying to push to mine… If so, start again from step 9.
If you encounter authentication issues, redo step 7.
- In GitHub (i.e. online)
- Click
Pull requests(top-leftish) - Click
New pull request(green, top-right) - Click
Create pull request(green, top-right)- It should already be on this repo unless you’ve been doing other things in Git
- In the comment window put your name so I know who you are if it isn’t obvious from your GitHub username
- Click
Create pull request(green, bottom-right)
- Final step!!! Lastly, you need to install an R package and it’s dependencies that we’ll be using in the practical. To do this, make sure you are online and in the R console type and run
install.packages("brms", dependencies = TRUE)
And you’re done!!! I’ll get a notification of your pull request and, if all’s in order, I’ll accept it. If not, I’ll reply with a comment on the pull request. You should receive a notification via the email you registered with your GitHub account.